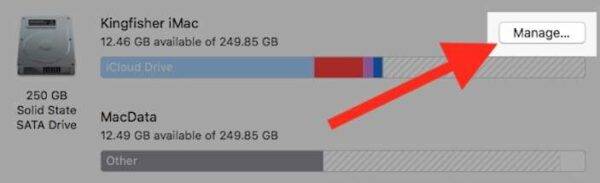
To free up storage on a Mac, identify what is taking up room before choosing what to remove. Start with files you recognise, check your backups and use the controls for your macOS version. This guide covers cleanup; our Mac storage capacity guide explains how to read the figures first.
Table of Contents
Plan how to free up storage on a Mac
Check that documents, photographs and project files have a recoverable copy. Open some of those copies before a large removal. Take extra care with photo libraries and files synchronised through iCloud, where a deletion can reach other devices.
Record the shortage you need to solve
Note the available capacity and the download, installation or copy that failed. A storage warning needs a different response from unreadable files or a disk that disappears. A cleanup does not repair a failing drive or guarantee that every slow Mac will become faster.
1. Review the storage categories
Let the storage view finish calculating, then inspect the categories that explain the shortage. System Data or Other is a broad grouping, not a folder you should try to empty. Focus on files and applications you can identify.
Open the view for your macOS version
On macOS Ventura 13 or later, open System Settings, then General and Storage. Earlier versions use About This Mac and its Storage view. Apple’s Mac storage guidance explains the version differences.
Earlier Macos Interface. Use The Storage View For The Version Installed On Your Mac.
2. Review the Bin and app downloads
Files in the Bin still occupy space until removed permanently. Inspect them before emptying it, especially after a recent large deletion. Manage downloaded films, music or other offline material through the application that owns it.
Make the final deletion deliberate
Confirm you can recover anything important elsewhere before choosing Empty Bin. Check automatic retention settings before enabling them. You do not need to empty the whole Library cache folder as a routine storage step.
3. Remove applications you no longer need
Check whether you still need an application to open older work. Keep licence details and relevant project files before uninstalling. Removing the app does not automatically cancel a paid subscription.
Follow the developer’s uninstall process
Quit the app and look for its documented uninstaller or removal option. Where none is provided, Finder’s Applications folder is the usual starting point. Follow Apple’s app removal instructions and keep system applications in place.
4. Inspect large personal files
Old downloads, exported videos and duplicate installers can be useful places to look. Open or identify each candidate before deleting it. A large project package or photo library may contain far more than its filename suggests.
Use Finder to review each candidate
Use Finder’s list view and size information to investigate a folder you recognise. Check the file’s location as well as its name. Move selected files only after deciding where they will live and how you will back them up.
5. Understand what iCloud will keep locally
Storage optimisation can release local copies when space is needed, while originals remain in iCloud. Files may then need an internet connection to download. Cloud account capacity and free space on the Mac are separate limits.
Review cloud settings before changing them
Read the relevant iCloud Drive or Photos options for your version and keep essential offline files available. Review Apple’s storage optimisation choices individually. Deleting an iCloud Drive file can remove it from other synchronised devices; it is different from releasing only a local copy.
Earlier Recommendations Screen. Review Each Option Individually Before Enabling Automatic Changes.
6. Identify device backups before removing them
An iPhone or iPad backup may be an important restore point. Check the device name and date, and confirm which backup you intend to keep. Do not remove the only usable copy simply because another backup appears newer.
Manage backups through Finder
On a compatible macOS version, select the connected device in Finder, open General and review Manage Backups. Follow Apple’s backup management instructions. Archive preserves a backup from being replaced; it does not free the space that backup occupies.
7. Check an external copy before removing an original
Copy selected files to a suitable external drive, then open them from that drive. Check that your regular backup includes their new location. Keep the drive available when applications need those files, and avoid moving an app’s working library without its own instructions.
Recheck capacity and the original task
After one reviewed change, check the available space and retry the task. If you still cannot free up storage on a Mac, bring the model, macOS version and warning to our Hartlepool team. Our computer storage cleanup overview can help you plan the next step without repeating broad deletions.
The Illusion of Stability in Modern Updates For most users, operating system updates are something that simply happen. They arrive quietly, often installing in the background, requiring little more than…
Macbook Neo, How Does It Compare To Air & Pro? Over the last few years the laptop market has experienced one of the most significant architectural changes in its history.…
Apple’s latest product announcements mark one of the most significant shifts in the Mac lineup in more than a decade. While Apple routinely updates its hardware with faster chips, incremental…
There is a particular kind of frustration that only a slow computer can produce. It is not dramatic. It is not urgent. It does not scream for attention. Instead, it…
Small business computer maintenance planning starts with the work you cannot afford to lose. Identify the computers, accounts and files behind those tasks, then agree when maintenance can happen and…
Phone says charging but battery not increasing is one of the most frustrating problems smartphone users face. You plug it in.The lightning bolt appears.It says “Charging.” But the battery percentage…
Apple’s rumour cycle always looks like a thousand disconnected leaks — until you line them up and notice the same themes repeating: AI-first silicon, camera and display differentiation, form-factor experiments (foldables / spatial…
Wi-Fi connected but no internet is one of the most frustrating messages you can see on a computer or laptop. The Wi-Fi icon shows full bars.It says “Connected.”But websites won’t…
Unfortunately, there was an error submitting your request.
Please try again later, or reach out to us directly. You can call us at +44 1429 280955 or email us at sales@kingfishercomputers.co.uk for assistance. We’re here to help you get your computer back up and running!
We’ve received your booking, Our team will get in touch with you shortly to confirm the details. You’re one step closer to having your computer fixed! If you have any urgent questions, feel free to contact us. Otherwise, sit back, and we’ll handle the rest.
Contact Kingfisher Computers
No appointment required. You’re welcome to pop into the shop during opening hours.
ENQUIRY RECEIVED
Thank you
Monday–Friday
9am–5pm
Saturday
9am–4:30pm
Sunday
Closed
Bank holidays
Closed
38 Church Street, Hartlepool, TS24 7DG For home visits and callouts, please wait for us to arrange a time.
Contact Kingfisher Computers
No appointment required. You’re welcome to pop into the shop during opening hours.
ENQUIRY RECEIVED
Thank you
Monday–Friday
9am–5pm
Saturday
9am–4:30pm
Sunday
Closed
Bank holidays
Closed
38 Church Street, Hartlepool, TS24 7DG For home visits and callouts, please wait for us to arrange a time.