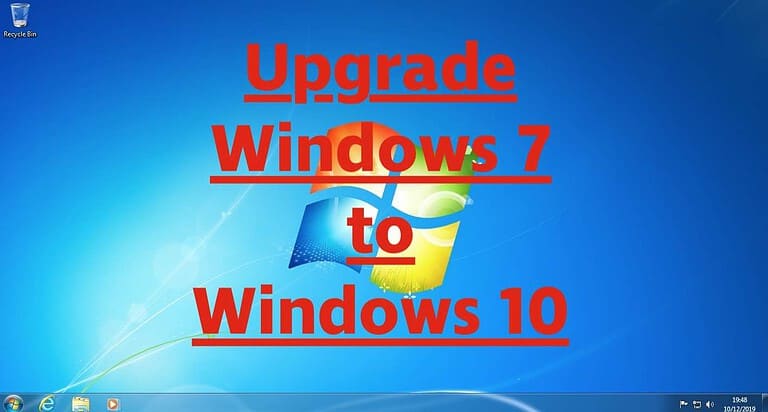
Ultimate Guide: Effortlessly Upgrade from Windows 7 to Windows 10
With the end of Windows 7 support, now is the time to upgrade your system to Windows 10 and ensure that your computer stays secure and up-to-date. But don’t worry, the process doesn’t have to be complicated. We’ve put together the ultimate guide to walk you through how to seamlessly upgrade from Windows 7 to Windows 10 without losing your data or breaking the bank.
Whether you’re a home user or managing a business network, this guide will take you through the exact steps to upgrade your system and keep everything running smoothly.
Table of Contents
1. Why Should You Upgrade from Windows 7 to Windows 10?
Windows 7 may have been a beloved operating system, but as of January 14, 2020, Microsoft has officially ended support for it. This means no more security patches, bug fixes, or technical support. If you’re still running Windows 7, your system is vulnerable to cyberattacks, malware, and other security threats.
Upgrading to Windows 10 offers you the latest security features, performance enhancements, and access to new Microsoft applications. Some of the major reasons to upgrade include:
Security: Windows 10 provides ongoing security patches and updates to protect your system.
Performance: The operating system is optimized for faster boot times and improved efficiency.
Compatibility: Windows 10 supports the latest software and hardware, keeping your system running smoothly.
Not only does Windows 10 offer advanced features, but it also keeps you protected in a digital landscape where vulnerabilities are constantly being exploited.
2. Preparing for Your Windows 7 to Windows 10 Upgrade
Before you begin the upgrade, there are a few key things you’ll need to do to ensure a smooth transition:
1. Back Up Your Data
The first thing you should do is back up all your important files and data. Although the upgrade process is designed to keep your data intact, it’s always better to be safe than sorry. Use an external hard drive, cloud storage, or Windows Backup to secure your files.
2. Check System Compatibility
Make sure your computer meets the system requirements for Windows 10. Here’s what you’ll need:
Processor: 1 gigahertz (GHz) or faster compatible processor or System on a Chip (SoC)
RAM: 1 GB for 32-bit or 2 GB for 64-bit
Hard Disk Space: 16 GB for 32-bit OS or 20 GB for 64-bit OS
Graphics Card: DirectX 9 or later with WDDM 1.0 driver
Display: 800×600
If you’re not sure whether your device meets these requirements, Microsoft has a Windows 10 Upgrade Assistant that can help you check.
3. Gather Your Windows 10 License Key
If you’re doing a fresh installation rather than an in-place upgrade, make sure you have your Windows 10 product key ready. You may be eligible for a free upgrade depending on your current license.
3. How to Upgrade from Windows 7 to Windows 10
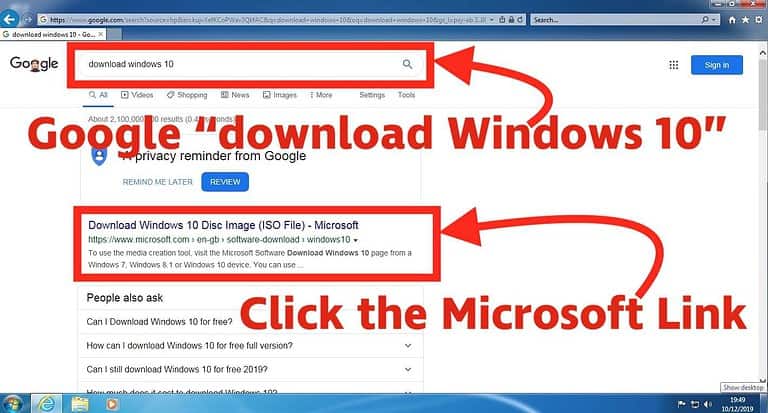
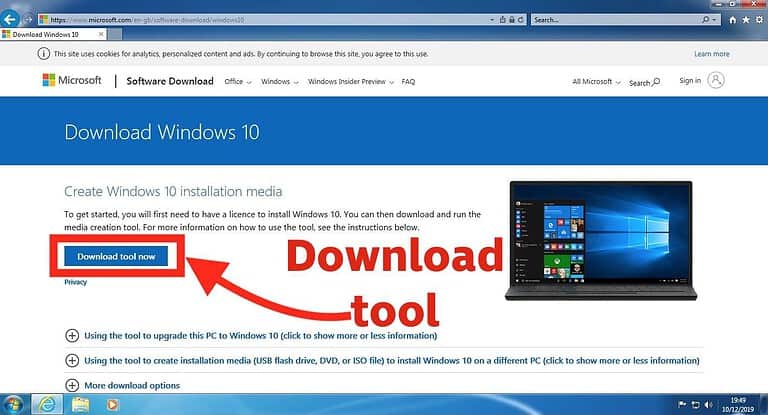
Now that you’re prepared, it’s time to upgrade from Windows 7 to Windows 10. Follow these steps to ensure a seamless transition:
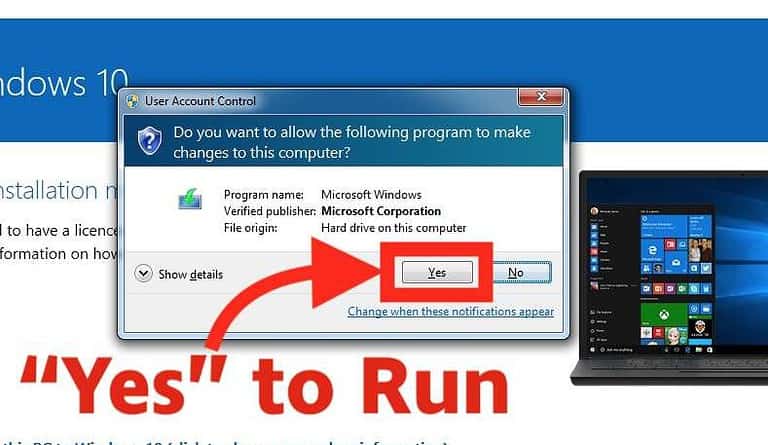
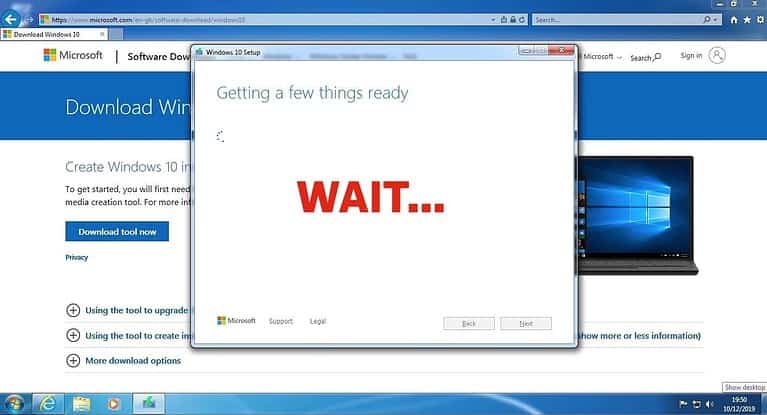
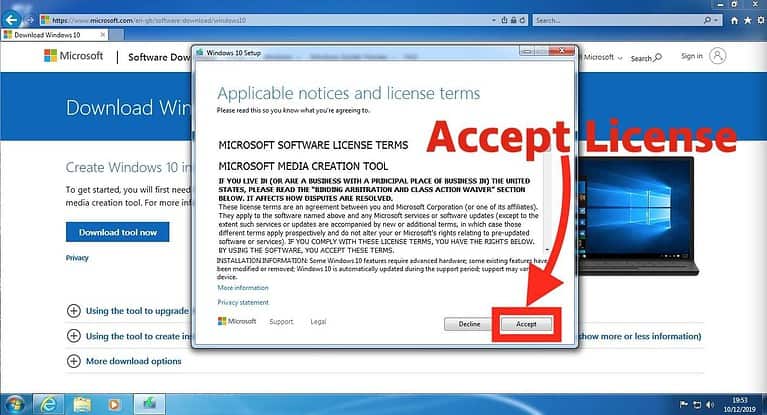
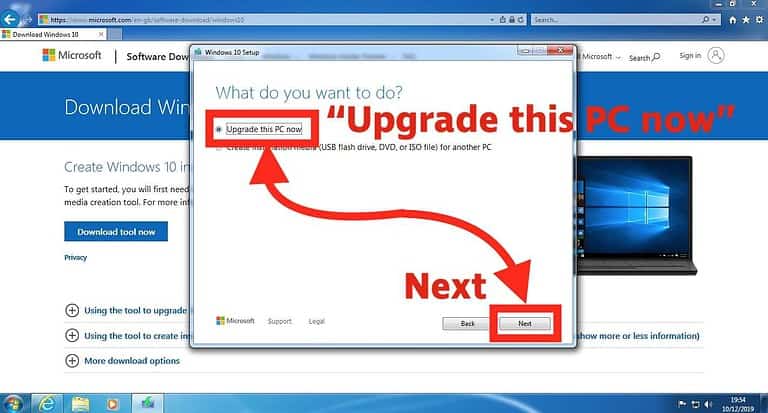
Once downloaded, run the installation tool. You’ll be given two options:
Upgrade this PC now
Create installation media for another PC
If you’re upgrading your current PC, select Upgrade this PC now.
Step 3: Follow On-Screen Instructions
The installation tool will guide you through the rest of the process. You’ll be asked whether you want to keep your files and applications or do a clean install. To keep your data intact, select the Keep personal files and apps option.
Step 4: Complete the Installation
Once the installation is complete, your PC will restart. After rebooting, Windows 10 will finalize the upgrade process. Depending on your internet connection and system speed, this could take anywhere from 30 minutes to several hours.
And Its Done… Upgrade From Windows 7 To Windows 10 Guide: Below Is A Video That Explains How To Upgrade From Windows 7 To Windows 10 While Preserving Your Files And Apps
4. Troubleshooting Common Upgrade Issues
While upgrading is typically straightforward, there are a few common issues you may encounter. Here’s how to handle them:
Installation Stuck: If the installation seems stuck, try restarting the process or checking your internet connection.
Compatibility Problems: If your hardware is too old to support Windows 10, consider upgrading your components or buying a new device.
Not Enough Space: If your hard drive doesn’t have enough space, clear out unnecessary files or consider using an external storage device for the installation.
If you run into any major issues, it may be time to contact an IT professional, such as the team at Kingfisher Computers, for expert assistance.
5. What to Expect After Upgrading to Windows 10
After upgrading from Windows 7 to Windows 10, you’ll notice several immediate benefits. Some of the new features include:
Improved Security: Windows 10 comes with Windows Defender, offering built-in malware protection, virus scanning, and a firewall.
Start Menu: The Start Menu is back and more powerful, combining the best of Windows 7 and Windows 8.
Cortana: Microsoft’s digital assistant, Cortana, is integrated to help with scheduling, reminders, and general queries.
Edge Browser: Microsoft Edge replaces Internet Explorer, providing a faster and more secure browsing experience.
You’ll also enjoy a more intuitive user interface and the ability to seamlessly integrate your system with Microsoft 365, cloud storage, and other tools that improve productivity.
Conclusion: Upgrade to Windows 10 for a Safer, Faster Experience
Upgrading from Windows 7 to Windows 10 isn’t just about staying current—it’s about ensuring that your system remains safe, efficient, and equipped with the latest features. With Windows 10, you’ll get the security updates you need to protect your data, performance enhancements to make your system faster, and new tools that will boost your productivity.
Don’t wait until it’s too late—start your upgrade today and stay ahead of the curve. If you need help, consult the experts at Kingfisher Computers to guide you through the process.
The Illusion of Stability in Modern Updates For most users, operating system updates are something that simply happen. They arrive quietly, often installing in the background, requiring little more than…
Macbook Neo, How Does It Compare To Air & Pro? Over the last few years the laptop market has experienced one of the most significant architectural changes in its history.…
Apple’s latest product announcements mark one of the most significant shifts in the Mac lineup in more than a decade. While Apple routinely updates its hardware with faster chips, incremental…
There is a particular kind of frustration that only a slow computer can produce. It is not dramatic. It is not urgent. It does not scream for attention. Instead, it…
In an era where nearly every aspect of personal computer maintenance and professional life is mediated through digital systems, your computer is no longer a luxury device — it is…
Phone says charging but battery not increasing is one of the most frustrating problems smartphone users face. You plug it in.The lightning bolt appears.It says “Charging.” But the battery percentage…
Apple’s rumour cycle always looks like a thousand disconnected leaks — until you line them up and notice the same themes repeating: AI-first silicon, camera and display differentiation, form-factor experiments (foldables / spatial…
Wi-Fi connected but no internet is one of the most frustrating messages you can see on a computer or laptop. The Wi-Fi icon shows full bars.It says “Connected.”But websites won’t…
Unfortunately, there was an error submitting your request.
Please try again later, or reach out to us directly. You can call us at +44 1429 280955 or email us at sales@kingfishercomputers.co.uk for assistance. We’re here to help you get your computer back up and running!
We’ve received your booking, Our team will get in touch with you shortly to confirm the details. You’re one step closer to having your computer fixed! If you have any urgent questions, feel free to contact us. Otherwise, sit back, and we’ll handle the rest.