How to Avoid Compatibility Issues When Building a PC
Adam Fornal
July 21st, 2025
PC component compatibility: check exact parts before buying
PC component compatibility depends on the exact models, firmware, connections and available space. A matching socket or a parts checker showing green is not the whole answer. Work through the checks below with the manufacturers’ specifications open and record any unanswered questions before ordering.
This guide is the detailed checking companion to our PC build planning guide. Use that guide to set your requirements and budget; use this one to verify a shortlisted combination. Neither a generic specification nor a previous successful build proves that a different revision will behave the same way.
Table of Contents
Record the exact models and the evidence for each compatibility check.
Start a compatibility record
Create a list containing each exact product code, the manufacturer’s specification page and the manual. Include the CPU, motherboard revision, complete memory kit, storage, graphics card, cooler, case and PSU. Add expansion cards and the case’s front connections. Do not record just a brand or product family.
Identify the precise motherboard
Look up its supported processors, memory generation, capacity and slot layout. Similar model names can identify different memory versions or board revisions. Check internal USB, audio, fan and lighting headers against the devices you will connect. A board fitting the case does not establish that every front port can be connected.
Verify CPU support and BIOS requirements
Find the exact CPU in the board manufacturer’s support list and note any required BIOS version. A socket match alone is insufficient. Ask how the supplied board’s firmware can be confirmed and, if necessary, updated before the new processor can start it. AMD’s Ryzen BIOS update guidance explains why processor support can depend on firmware.
Match the complete memory kit
Record the kit’s product code, generation, module count and total capacity. Check the CPU and board documentation together. A memory speed printed on the packaging may describe a profile setting rather than the speed the system will use automatically. Establish a supported starting configuration before considering optional tuning.
Use the board’s memory support information
DDR4 and DDR5 require the appropriate platform and are not interchangeable. Desktop and laptop modules also use different formats. A qualified vendor list identifies kits the board maker has tested in stated configurations; match the complete code and module arrangement. ASUS explains how to find CPU and memory support lists. Use the equivalent page for your own board.
Check slots and module count
Follow the exact manual’s slot order for one, two or more modules. Do not rely on a universal colour rule. Two separately purchased kits with similar labels are not the same as a single tested kit. If expanding an existing computer, verify the supported configuration rather than assuming another pair will retain the original speed.
Plan all storage and expansion together
List every drive and expansion card you expect to install. Check both physical slots and the board’s connection sharing rules. A full length slot can have fewer electrical lanes than its appearance suggests. The manual should explain which combinations reduce bandwidth or disable another connection.
Confirm drive interface and connections
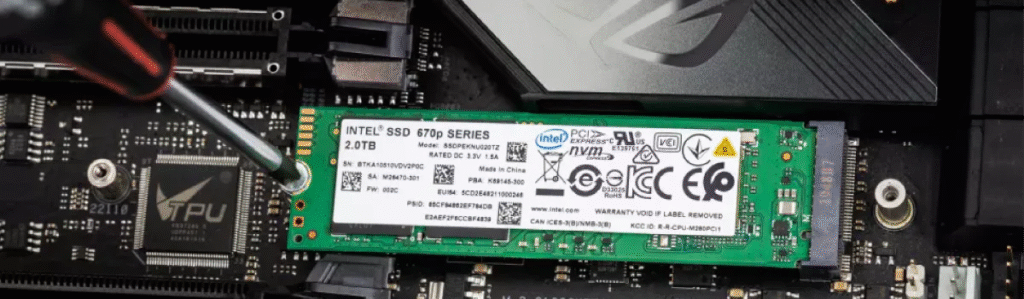
A conventional SATA drive needs appropriate data and power connections, plus a suitable mounting position. For an M.2 drive, check its interface, length, supported slot and any heatsink clearance. M.2 describes a format; it does not by itself mean that every M.2 drive and slot use the same protocol.
Read the M.2 sharing notes
Look for the storage and expansion configuration tables, including notes that depend on the installed processor. Record which slot will hold each drive and whether any SATA port or PCIe slot becomes unavailable. Check the mounting screw or latch and heatsink instructions too. Do not force a drive into an unsupported connector.
An Installed M.2 Drive. Check The Interface, Length And Sharing Rules For The Particular Slot.
Check the exact graphics card
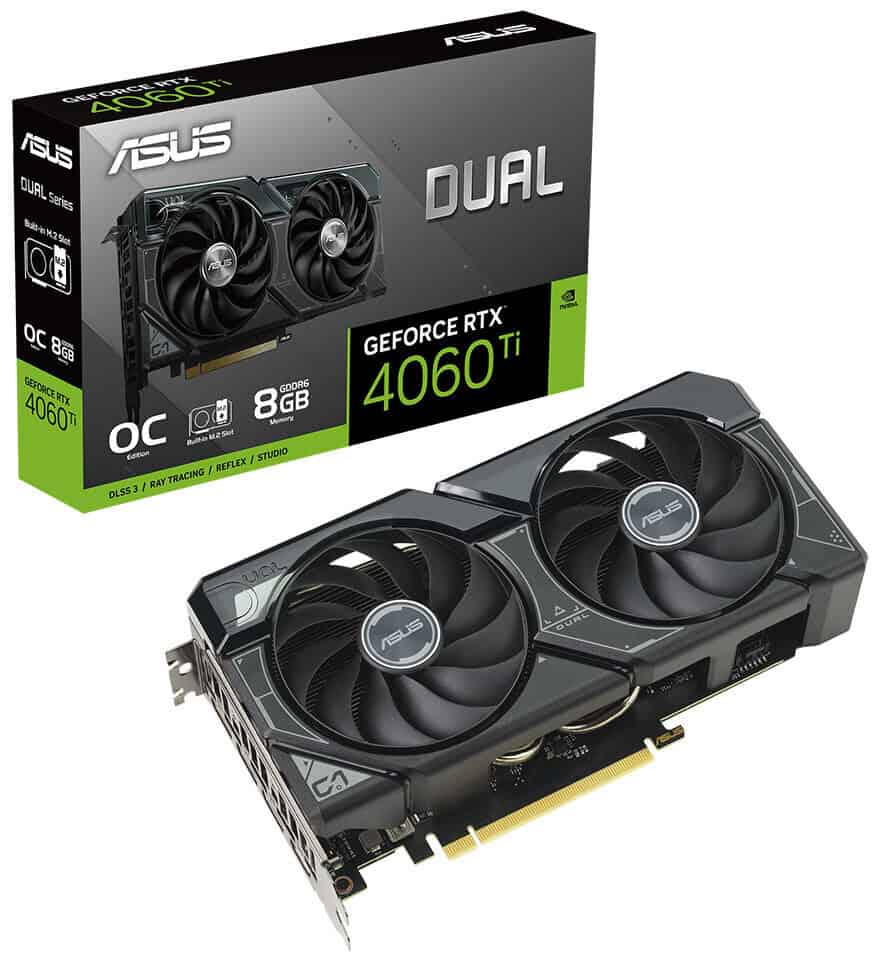
Use the card manufacturer’s model page for dimensions, power requirements and display outputs. Cards using the same graphics chip can have different coolers and connectors. Confirm the recommended motherboard slot and whether a riser, if used, is supported. Check the monitor connection as well as the connection inside the computer.
Measure graphics clearance after cooling is included
Compare card length, thickness and height with the case’s usable space. Include front radiators, drive cages, adjacent cards and room to connect power cables as instructed. A published maximum length may assume a particular fan or radiator arrangement. Check the combined layout, not several independent maximum dimensions.
Check Dimensions For The Exact Card Model, Including Its Cooler And Power Cable Space.
Verify power and connector requirements
Check the complete system’s needs against the component makers’ guidance. PSU suitability includes its format, dimensions, connectors and supported cable arrangement as well as capacity. An efficiency badge does not establish that the unit meets every requirement of a particular graphics card or build.
List the required power connections
Record motherboard, CPU, graphics, drive and controller power requirements. Follow the manufacturers’ instructions for connectors, adapters and cable routing. Do not assume that CPU and graphics power plugs are interchangeable or that any adapter resolves a missing connection. If the instructions conflict or leave a question unanswered, resolve it before powering the system.
Keep modular cables matched to the PSU
Use the supplied cables or replacements explicitly approved for the exact PSU. The PSU end of a modular cable is not a universal standard. Check the manufacturer’s current information, such as Corsair’s PSU cable compatibility chart, for the product it actually covers. Do not open the PSU.
Check cooling as a complete arrangement
Write down the cooler, fans, radiator if applicable, mounting kit and control connections. Check the exact CPU socket and the manufacturer’s installation instructions. A cooler being listed as suitable for a socket does not prove it clears the memory, graphics card or case panel in your combination.
Confirm the mounting hardware
Check that the required brackets, backplate and fasteners are included for the chosen platform. Some products need a separately supplied mounting kit. Follow the manual’s thermal material and tightening instructions; do not combine unrelated mounting parts because they appear to fit.
Allow for RAM and fan height
Compare the cooler’s RAM clearance with the height of the selected modules. If a fan has to be raised to clear them, check the resulting total height against the case limit. The height printed for the cooler’s default arrangement may no longer describe the installed assembly.
Keep usable airflow paths
Check supported fan positions, filters and nearby obstructions. Plan cables so they remain clear of fan blades and do not prevent panels closing properly. Fan count alone is not a reliable cooling comparison. Review temperatures and noise under your normal workload once the system is assembled.
Include radiator, fans and tubing space
Radiator support is more than a length label. Include its width, thickness, fans, fittings and the room needed for tubing. Check for conflicts with memory, board heatsinks and the graphics card. Follow the cooler manufacturer’s supported orientation and installation guidance rather than choosing a position from appearance alone.
Match pump and controller connections
Follow the cooler manual for pump power, fan control, USB and lighting connections. Check the board header ratings and any supplied controller requirements. Do not improvise a pump power arrangement from a generic adapter suggestion. If you cannot verify the intended connection, ask the product manufacturer or a repair specialist.
Resolve uncertainties before ordering
Give each compatibility check a status: confirmed, not applicable or unresolved. Attach the relevant manual page or specification to the record. An unresolved question is more useful than a guessed answer, because it tells you what to ask the retailer or manufacturer before spending money.
Prefer specifications for the exact revision
Use official model pages and manuals first. Reviews and build photographs may reveal practical clearance problems, but can describe a different revision or arrangement. Check dates and product codes. Save the evidence that applies to your parts rather than relying on a remembered forum recommendation.
Use automated checks as a starting point
A checker is useful for obvious conflicts and a running list. Review its warnings and any checks it says are incomplete. It may not know the supplied BIOS version, every cable bend requirement or all combinations of radiator, memory and graphics card. Manual verification still matters.
Recheck substitutions
If a part becomes unavailable, compare the replacement against every affected requirement. A different GPU cooler can change clearance; a different board can change memory support and internal ports. Keep the original list as a record and mark what changed, instead of treating a similar price as proof of equivalence.
Do a final check before assembly
Inspect delivered product codes against the list. Review the installation order and identify which connections become difficult to reach once other components are fitted. Follow appropriate handling precautions and the manufacturers’ instructions. Never force a connector or mounting point to overcome an unexplained mismatch.
A successful first boot is a useful checkpoint, rather than proof that every connection and workload has been tested. If something behaves unexpectedly, use the symptom to organise your checks:
No picture: record the exact CPU and graphics card, which display socket the cable uses, and any diagnostic light or code. Compare that arrangement with the manuals before assuming a component has failed.
Unexpected memory capacity: record the complete kit code, installed module count and slot positions. Compare the recognised capacity and supported configuration with the board’s documentation before changing several settings at once.
A drive is missing: record its model, interface and slot or cable connection. Check the documented sharing rules and the expected firmware detection screen. Do not initialise a drive containing important files as a diagnostic shortcut.
A problem appears under load: note the application, settings, messages and whether the computer restarts or loses power. Compatibility, cooling, hardware and software questions can overlap, so the symptom alone does not establish the cause.
Keep useful troubleshooting information
Have the board manual and component support details available on another device. If the computer will not start, record the exact diagnostic light or code and what is connected. Power it down before changing hardware. A complete parts list helps support staff distinguish compatibility questions from a possible failed component.
Turn the checks into a usable record
PC component compatibility checks reduce avoidable mistakes; they cannot guarantee that every delivered part is fault free. Keep the evidence with your purchase records and check the completed system before moving important work onto it. Retain a separate verified backup during any migration.
Keep the record for later upgrades
Record the installed BIOS version, occupied slots and exact PSU model once the build works. Update the list after changes. This makes a later memory, graphics or storage decision easier to assess, without assuming that spare physical space or an unused socket guarantees upgrade support.
Ask about the unresolved check
If you need help, send the Hartlepool team your parts list and identify the specific concern or symptom. Clear photographs of model labels or the available space can help, with private information removed. We will discuss a suitable next step and agree any work and costs before proceeding.
The Illusion of Stability in Modern Updates For most users, operating system updates are something that simply happen. They arrive quietly, often installing in the background, requiring little more than…
Macbook Neo, How Does It Compare To Air & Pro? Over the last few years the laptop market has experienced one of the most significant architectural changes in its history.…
Apple’s latest product announcements mark one of the most significant shifts in the Mac lineup in more than a decade. While Apple routinely updates its hardware with faster chips, incremental…
There is a particular kind of frustration that only a slow computer can produce. It is not dramatic. It is not urgent. It does not scream for attention. Instead, it…
Small business computer maintenance planning starts with the work you cannot afford to lose. Identify the computers, accounts and files behind those tasks, then agree when maintenance can happen and…
Phone says charging but battery not increasing is one of the most frustrating problems smartphone users face. You plug it in.The lightning bolt appears.It says “Charging.” But the battery percentage…
Apple’s rumour cycle always looks like a thousand disconnected leaks — until you line them up and notice the same themes repeating: AI-first silicon, camera and display differentiation, form-factor experiments (foldables / spatial…
Wi-Fi connected but no internet is one of the most frustrating messages you can see on a computer or laptop. The Wi-Fi icon shows full bars.It says “Connected.”But websites won’t…
Unfortunately, there was an error submitting your request.
Please try again later, or reach out to us directly. You can call us at +44 1429 280955 or email us at sales@kingfishercomputers.co.uk for assistance. We’re here to help you get your computer back up and running!
We’ve received your booking, Our team will get in touch with you shortly to confirm the details. You’re one step closer to having your computer fixed! If you have any urgent questions, feel free to contact us. Otherwise, sit back, and we’ll handle the rest.
Contact Kingfisher Computers
No appointment required. You’re welcome to pop into the shop during opening hours.
ENQUIRY RECEIVED
Thank you
Monday–Friday
9am–5pm
Saturday
9am–4:30pm
Sunday
Closed
Bank holidays
Closed
38 Church Street, Hartlepool, TS24 7DG For home visits and callouts, please wait for us to arrange a time.
Contact Kingfisher Computers
No appointment required. You’re welcome to pop into the shop during opening hours.
ENQUIRY RECEIVED
Thank you
Monday–Friday
9am–5pm
Saturday
9am–4:30pm
Sunday
Closed
Bank holidays
Closed
38 Church Street, Hartlepool, TS24 7DG For home visits and callouts, please wait for us to arrange a time.