Thermal Paste 101: When, Why, and How to Replace It
Adam Fornal
June 11th, 2025
Table of Contents
Thermal Paste 101: When, Why, and How to Replace It
Understanding Thermal Paste 101 is essential for anyone who wants to maintain optimal computer performance and prevent costly hardware damage. This comprehensive guide covers everything you need to know about thermal paste, from its fundamental role in computer cooling to step-by-step replacement procedures. Whether you’re a complete beginner or someone looking to refresh their knowledge, this Thermal Paste 101 guide will equip you with the expertise needed to handle this critical maintenance task confidently.
Thermal paste, also known as thermal compound or thermal interface material, serves as the crucial bridge between your processor and its cooling system. Without proper thermal management through quality thermal paste application, even the most powerful processors can suffer from overheating, leading to reduced performance, system instability, and potential permanent damage. This Thermal Paste 101 tutorial explores why this seemingly simple substance plays such a vital role in modern computing and how proper maintenance can extend your system’s lifespan significantly.
The Science Behind Thermal Paste and Computer Cooling
Before diving into practical applications, it’s important to understand the physics that make Thermal Paste 101 knowledge so valuable. Computer processors generate substantial heat during operation, with modern CPUs producing temperatures that can exceed 100 degrees Celsius under heavy loads. This heat must be efficiently transferred away from the processor to prevent thermal throttling and hardware damage.
The challenge lies in the microscopic imperfections present on all metal surfaces, including CPU heat spreaders and cooler contact plates. These tiny gaps and scratches create air pockets that act as thermal insulators, dramatically reducing heat transfer efficiency. Air is an excellent insulator, which is why proper Thermal Paste 101 application focuses on eliminating these air gaps through the use of thermally conductive compounds.
How Thermal Paste Works at the Molecular Level
Understanding Thermal Paste 101 requires grasping how thermal compounds function at the microscopic level. Quality thermal paste contains particles of thermally conductive materials such as silver, aluminum oxide, or zinc oxide suspended in a carrier medium. When applied correctly, these particles fill the microscopic imperfections between surfaces, creating a continuous thermal pathway that allows heat to flow efficiently from the processor to the cooling system.
Different thermal paste formulations offer varying levels of thermal conductivity, measured in watts per meter-kelvin (W/mK). Higher values indicate better heat transfer capabilities, but other factors like ease of application, longevity, and electrical conductivity also influence the choice of thermal compound. This Thermal Paste 101 guide will help you understand these trade-offs and select the appropriate product for your specific needs.
Thermal Paste 101: When, Why, And How To Replace It 5
The Role of Thermal Paste in System Stability
Proper thermal management through correct Thermal Paste 101 practices directly impacts system stability and performance. When processors overheat, they automatically reduce their operating frequency to prevent damage, a process called thermal throttling. This protective mechanism sacrifices performance to maintain safe operating temperatures, resulting in slower application response times, reduced gaming performance, and general system sluggishness.
More severely, inadequate cooling can cause system crashes, data corruption, and permanent hardware damage. The relatively small investment in quality thermal paste and the time required to apply it correctly can prevent thousands of dollars in hardware replacement costs. This economic reality makes Thermal Paste 101 knowledge valuable for anyone who relies on their computer for work, gaming, or other important tasks.
Identifying When Your System Needs New Thermal Paste
Recognizing the signs that indicate thermal paste replacement is necessary represents a crucial aspect of Thermal Paste 101 knowledge. Unlike some computer components that fail suddenly, thermal paste degradation typically occurs gradually over time, making it easy to overlook until performance problems become obvious.
Temperature Monitoring and Warning Signs
The most reliable method for determining when Thermal Paste 101 maintenance is needed involves monitoring system temperatures during normal operation. Modern processors include built-in temperature sensors that can be accessed through various software utilities. Establishing baseline temperatures when your system is performing well allows you to track changes over time and identify when thermal paste replacement becomes necessary.
Generally, desktop processors should operate below 80 degrees Celsius under heavy loads, while laptop processors may run slightly warmer due to space constraints. If you notice temperatures consistently exceeding these thresholds, or if temperatures have increased significantly compared to previous measurements, thermal paste degradation may be the culprit. This Thermal Paste 101 principle applies regardless of your processor brand or cooling solution.
Performance Degradation Indicators
Beyond temperature monitoring, several performance indicators suggest that Thermal Paste 101 maintenance may be overdue. Thermal throttling manifests as unexplained performance drops during demanding tasks like gaming, video editing, or 3D rendering. If applications that previously ran smoothly begin stuttering or responding slowly, thermal issues could be the underlying cause.
System instability represents another warning sign that Thermal Paste 101 attention is needed. Random crashes, unexpected shutdowns, or blue screen errors during intensive tasks often correlate with overheating issues. While these symptoms can have multiple causes, thermal paste replacement should be considered, especially if the system is several years old or has never received thermal maintenance.
Age-Based Replacement Guidelines
Even without obvious performance problems, Thermal Paste 101 best practices recommend proactive replacement based on system age and usage patterns. Most thermal compounds begin degrading after 2-3 years of continuous use, with some budget formulations losing effectiveness even sooner. High-performance systems that operate under heavy loads may require more frequent attention.
Environmental factors also influence thermal paste longevity. Systems exposed to extreme temperatures, high humidity, or significant temperature cycling may experience accelerated thermal compound degradation. For professional workstations or gaming systems where reliability is paramount, annual Thermal Paste 101 maintenance can prevent performance issues before they impact productivity or gaming experiences.
Visual Inspection Techniques
When possible, visual inspection provides valuable information about thermal paste condition. If you’re comfortable removing your CPU cooler for other maintenance tasks, examining the existing thermal paste offers insights into its current state. Fresh thermal paste appears smooth and evenly distributed, while aged compound may show signs of drying, cracking, or separation.
Proper Thermal Paste 101 evaluation includes checking for complete coverage across the processor surface. Gaps in coverage or uneven distribution indicate that replacement is necessary regardless of the paste’s apparent condition. However, remember that removing the cooler for inspection requires thermal paste replacement, so only perform visual checks when you’re prepared to complete the full maintenance procedure.
Thermal Paste 101: When, Why, And How To Replace It 6
System-Specific Considerations
Different computer configurations present unique challenges that influence Thermal Paste 101 maintenance schedules and procedures. Desktop systems typically offer easier access to processors and more flexibility in thermal paste selection, while laptops require more careful consideration due to space constraints and warranty implications.
Gaming systems and workstations that operate under sustained high loads benefit from premium thermal compounds and more frequent maintenance intervals. Conversely, basic office computers used for light tasks may operate satisfactorily with standard thermal paste for extended periods. Understanding these nuances helps optimize your Thermal Paste 101 maintenance strategy for your specific use case.
Choosing appropriate thermal paste represents a critical decision in Thermal Paste 101 mastery. The market offers numerous options with varying characteristics, prices, and performance levels. Understanding these differences helps ensure you select a product that matches your system’s requirements and your comfort level with application procedures.
Types of Thermal Paste and Their Characteristics
Thermal Paste 101 education begins with understanding the major categories of thermal compounds available. Ceramic-based pastes offer excellent electrical insulation properties, making them safe for beginners who worry about accidental spillage causing short circuits. These compounds typically provide moderate thermal conductivity while remaining cost-effective for most applications.
Metal-based thermal pastes, particularly those containing silver or aluminum particles, offer superior thermal conductivity but require more careful application due to their electrical conductivity. Liquid metal compounds represent the premium tier, providing exceptional heat transfer capabilities but demanding expert-level application skills and compatibility considerations that make them unsuitable for Thermal Paste 101 beginners.
Thermal Paste 101: When, Why, And How To Replace It 7
Performance vs. Practicality Considerations
Selecting thermal paste involves balancing performance requirements against practical considerations like application difficulty and cost. For most users, mid-range ceramic or hybrid compounds provide excellent performance without the complexity of premium alternatives. These products typically offer thermal conductivity values between 3-8 W/mK, which proves sufficient for most processors when applied correctly.
Thermal Paste 101 guidance suggests that application technique matters more than compound selection for typical use cases. A properly applied budget thermal paste often outperforms a premium compound applied incorrectly. Focus on developing good application skills before investing in expensive specialty compounds, especially if you’re new to thermal paste replacement procedures.
Brand Recommendations and Reliability
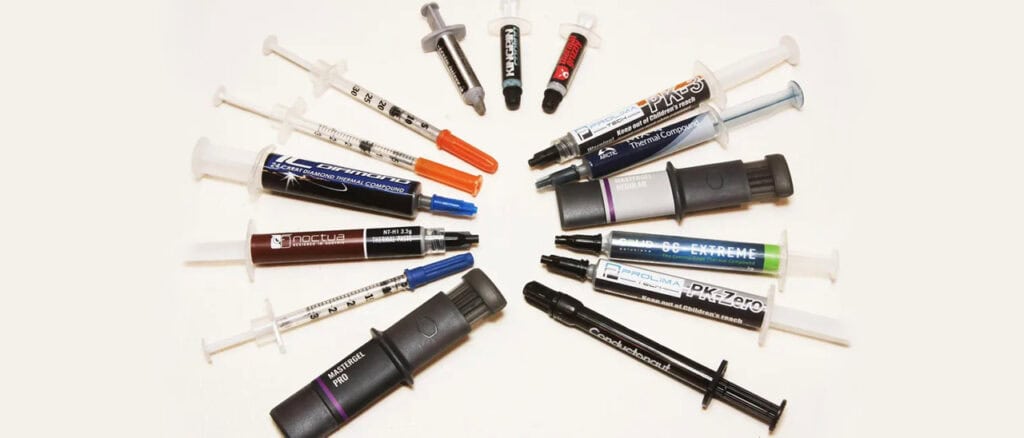
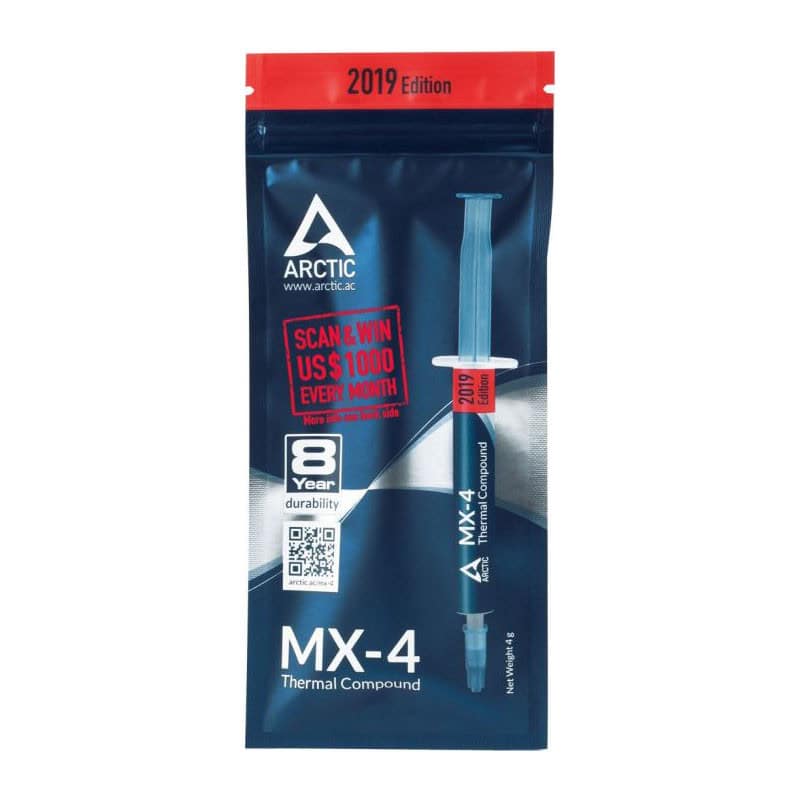
Established thermal paste manufacturers typically offer products with consistent quality and well-documented performance characteristics. Popular brands like Arctic MX-4, Noctua NT-H1, and Thermal Grizzly Kryonaut have earned reputations for reliability and performance in the Thermal Paste 101 community. These products provide detailed application instructions and have been tested extensively across various processor and cooler combinations.
Avoiding unknown or extremely cheap thermal compounds helps ensure reliable performance and longevity. While premium options exist, most users achieve excellent results with mainstream products from reputable manufacturers. Reading reviews and checking compatibility with your specific processor and cooler combination provides additional confidence in your Thermal Paste 101 product selection.
Thermal Paste 101: When, Why, And How To Replace It 8
Essential Tools and Preparation for Thermal Paste Replacement
Successful Thermal Paste 101 application requires proper tools and preparation to ensure clean, safe, and effective thermal paste replacement. Having the right equipment before beginning the process prevents delays and reduces the risk of damage to sensitive components.
Required Tools and Materials
Basic Thermal Paste 101 tool requirements include the thermal paste itself, cleaning supplies for removing old compound, and basic hand tools for accessing your processor. Isopropyl alcohol with a concentration of 90% or higher provides effective cleaning without leaving residue. Coffee filters or lint-free cloths work better than paper towels for cleaning delicate surfaces.
Small plastic scrapers or old credit cards help remove stubborn thermal paste residue without scratching metal surfaces. Avoid metal tools that could damage processor heat spreaders or cooler contact plates. A small flashlight or headlamp improves visibility when working inside computer cases, especially in cramped laptop installations.
Safety Equipment and Precautions
Proper Thermal Paste 101 procedures include appropriate safety measures to protect both you and your computer components. Anti-static wrist straps or regular grounding by touching unpainted metal surfaces prevent electrostatic discharge that could damage sensitive electronics. Work in a well-ventilated area when using cleaning solvents, and avoid smoking or open flames near flammable materials.
Remove jewelry and wear close-fitting clothing to prevent accidental contact with computer components. Keep your workspace organized and well-lit to prevent dropping small screws or components. Having a magnetic parts tray or small containers helps organize screws and small parts during disassembly.
Workspace Preparation and Organization
Creating an appropriate workspace significantly impacts Thermal Paste 101 success rates. Choose a clean, flat surface with adequate lighting and ventilation. Avoid carpeted areas where static electricity buildup poses risks to computer components. A large towel or anti-static mat provides a clean work surface and helps organize tools and components.
Photography or note-taking during disassembly helps ensure proper reassembly, especially for complex laptop configurations. Modern smartphones provide excellent close-up photography capabilities for documenting cable connections and component orientations before removal.
Pre-Application System Preparation
Before beginning Thermal Paste 101 procedures, ensure your system is completely powered down and disconnected from all power sources. For desktop systems, switch off the power supply unit if it includes a power switch. Remove the main power cable and any other connections to eliminate residual power in the system.
Allow adequate cooling time before beginning work, especially if the system was recently under heavy load. Hot components pose burn risks and may make handling difficult. Plan for adequate time to complete the entire procedure without rushing, as hurried work increases the risk of mistakes or component damage.
Different computer configurations require varying levels of disassembly to access the processor and cooler. Desktop systems typically offer straightforward access, while laptops may require extensive disassembly and careful attention to warranty implications. Research your specific model’s disassembly requirements before beginning Thermal Paste 101 procedures.
Some systems include additional components like thermal pads on GPU or chipset cooling that may require attention during thermal paste replacement. Understanding the complete thermal management system helps ensure comprehensive maintenance and optimal results from your Thermal Paste 101 efforts.
Mastering the actual Thermal Paste 101 application process requires careful attention to detail and systematic approach. Each step builds upon the previous one, making it essential to complete each phase thoroughly before proceeding to the next.
Removing Old Thermal Paste
The first critical step in any Thermal Paste 101 procedure involves completely removing existing thermal compound from both the processor and cooler surfaces. Incomplete removal can create uneven surfaces and air pockets that compromise thermal transfer efficiency.
Begin by carefully removing the CPU cooler according to your system’s specific requirements. Desktop coolers typically use retention clips, screws, or twist-lock mechanisms, while laptop coolers may require removing multiple small screws and carefully disconnecting fan cables. Work slowly and methodically to avoid damaging delicate components or connections.
Cleaning Techniques and Best Practices
Once surfaces are accessible, Thermal Paste 101 cleaning procedures focus on complete removal of old compound without damaging underlying surfaces. Apply isopropyl alcohol to a lint-free cloth rather than directly to computer components to prevent liquid from seeping into sensitive areas. Work in small sections, allowing the alcohol to soften the old paste before gently wiping it away.
For stubborn residue, plastic scrapers help remove hardened compound without scratching metal surfaces. Never use metal tools or abrasive materials that could damage the processor heat spreader or cooler contact plate. Multiple cleaning passes with fresh alcohol and clean cloths ensure complete removal of all thermal compound residue.
Surface Inspection and Preparation
After cleaning, inspect both surfaces carefully under good lighting to ensure complete thermal paste removal. Any remaining residue will compromise the new application’s effectiveness. Look for scratches, dents, or other damage that might affect thermal transfer. Minor imperfections are normal, but significant damage may require professional attention or component replacement.
This Thermal Paste 101 inspection phase also provides an opportunity to check for proper processor seating and cooler mounting system condition. Loose or damaged mounting hardware should be addressed before applying new thermal paste to ensure proper contact pressure and long-term reliability.
Applying New Thermal Paste
Proper Thermal Paste 101 application technique significantly impacts thermal transfer efficiency and system performance. The goal is achieving complete, even coverage with minimal thickness while avoiding air bubbles or gaps in the thermal interface.
The most commonly recommended application method involves placing a small amount of thermal paste at the center of the processor heat spreader. The amount should be roughly equivalent to a grain of rice for most desktop processors, though specific requirements may vary based on processor size and thermal paste characteristics.
Application Methods and Techniques
Several Thermal Paste 101 application methods exist, each with advantages and disadvantages. The dot method involves placing a small amount at the processor center and allowing cooler mounting pressure to spread the paste evenly. This approach works well for most situations and minimizes the risk of applying too much compound.
The spread method involves manually distributing thermal paste across the processor surface using a plastic spreader or credit card edge. While this approach provides more control over coverage, it increases the risk of trapping air bubbles and requires more skill to execute properly. Most Thermal Paste 101 guides recommend the dot method for beginners due to its simplicity and reliability.
Cooler Installation and Final Steps
After applying thermal paste, carefully reinstall the cooler using the reverse process of removal. Ensure even mounting pressure by tightening screws or clips in a diagonal pattern rather than completing one side before moving to the other. This technique helps achieve uniform contact pressure and prevents uneven paste distribution.
Avoid removing and reinstalling the cooler multiple times, as this can create air bubbles and uneven coverage. If repositioning becomes necessary, clean both surfaces and apply fresh thermal paste rather than attempting to reuse disturbed compound. This Thermal Paste 101 principle ensures optimal thermal transfer and system reliability.
Post-Installation Testing and Monitoring
Completing the physical Thermal Paste 101 application process marks the beginning of the testing and monitoring phase. Proper verification ensures that the thermal paste replacement was successful and that your system operates within safe temperature ranges.
Begin with a visual inspection to ensure all components are properly reconnected and seated. Check that fan cables are connected and that no loose screws or parts remain in the system. Power on the system and immediately monitor temperatures using hardware monitoring software to verify that the processor is cooling properly.
Temperature Monitoring and Baseline Establishment
Initial Thermal Paste 101 testing should focus on idle temperatures and gradual load increases. Allow the system to reach thermal equilibrium at idle, typically 10-15 minutes after startup. Record these baseline temperatures for future reference and comparison with previous measurements.
Gradually increase system load using stress testing software or demanding applications while monitoring temperatures closely. Properly applied thermal paste should result in temperatures similar to or lower than previous measurements, assuming other system conditions remain constant. Sudden temperature spikes or readings that exceed safe limits indicate potential application problems that require immediate attention.
Long-term Monitoring and Maintenance Scheduling
Successful Thermal Paste 101 application should provide years of reliable thermal performance with proper system maintenance. Establish a monitoring routine that tracks temperatures during various usage scenarios to identify gradual degradation over time. Most systems benefit from thermal paste replacement every 2-3 years, though high-performance applications may require more frequent attention.
Document your thermal paste replacement procedure, including the specific product used, application date, and baseline temperature measurements. This information helps establish maintenance schedules and provides valuable reference data for future Thermal Paste 101 procedures. Regular monitoring and proactive maintenance prevent performance degradation and extend system lifespan significantly.
Troubleshooting Common Thermal Paste Issues
Even with careful attention to Thermal Paste 101 procedures, occasional problems can arise during or after thermal paste replacement. Understanding common issues and their solutions helps ensure successful thermal management and optimal system performance.
Temperature Problems After Replacement
If system temperatures remain high or increase after thermal paste replacement, several Thermal Paste 101 troubleshooting steps can help identify and resolve the underlying issues. First, verify that the cooler is properly mounted with adequate contact pressure. Loose mounting can create gaps that compromise thermal transfer regardless of paste quality.
Check that thermal paste application covered the entire processor surface without gaps or uneven distribution. Insufficient coverage or air bubbles can create hot spots that lead to elevated temperatures. If visual inspection reveals application problems, clean both surfaces and reapply thermal paste using proper techniques.
Air Bubble and Coverage Issues
Air bubbles represent one of the most common Thermal Paste 101 problems, often resulting from improper application technique or cooler installation procedures. These bubbles act as thermal insulators, preventing efficient heat transfer and creating localized hot spots on the processor surface.
Prevention involves proper application technique and avoiding cooler removal and reinstallation after paste application. If air bubbles are suspected, the only reliable solution involves complete thermal paste removal and reapplication. While this requires additional time and materials, it ensures optimal thermal transfer and prevents potential hardware damage from overheating.
Cooler Contact and Mounting Problems
Inadequate contact between the processor and cooler can compromise thermal transfer regardless of thermal paste quality. This Thermal Paste 101 issue often results from incorrect mounting procedures, damaged mounting hardware, or incompatible cooler designs. Check that all mounting screws are properly tightened and that the cooler sits flat against the processor surface.
Some cooler designs require specific mounting orientations or additional hardware for proper contact. Consult manufacturer documentation to verify correct installation procedures for your specific cooler model. Warped or damaged cooling surfaces may require professional attention or component replacement to achieve proper contact.
Performance and Stability Issues
Thermal paste problems can manifest as system instability, performance degradation, or unexpected shutdowns rather than obvious temperature increases. These Thermal Paste 101 symptoms often indicate thermal throttling or protection mechanisms that sacrifice performance to prevent hardware damage.
Modern processors include sophisticated thermal management systems that automatically reduce operating frequencies when temperatures exceed safe thresholds. While these systems protect hardware from damage, they significantly impact system performance and user experience. Proper thermal paste application helps maintain optimal performance by keeping processor temperatures within normal operating ranges.
Identifying Thermal Throttling
Thermal throttling can be difficult to identify without proper monitoring tools, as it often manifests as subtle performance reductions rather than obvious problems. Thermal Paste 101 troubleshooting involves using hardware monitoring software to track processor frequencies and temperatures during various usage scenarios.
If processor frequencies drop significantly under load while temperatures remain elevated, thermal throttling is likely occurring. This indicates inadequate cooling that may result from thermal paste problems, cooler issues, or other thermal management failures. Addressing the underlying thermal problems typically restores full performance and system stability.
System Stability and Reliability
Poor thermal management through inadequate Thermal Paste 101 practices can compromise system stability and reliability. Overheating processors may cause random crashes, data corruption, or unexpected shutdowns that can result in work loss or system damage. These problems often worsen over time as thermal paste continues to degrade.
Maintaining proper thermal management through regular Thermal Paste 101 maintenance prevents these stability issues and ensures reliable system operation. The relatively small investment in thermal paste replacement pays significant dividends in system reliability and performance consistency over time.
Advanced Thermal Paste Techniques and Considerations
Beyond basic Thermal Paste 101 application, several advanced techniques and considerations can further optimize thermal management for demanding applications or specific use cases. These approaches require additional skill and understanding but can provide meaningful performance improvements for enthusiasts and professionals.
Specialized Applications and Environments
High-performance computing environments, overclocking applications, and industrial use cases may require specialized Thermal Paste 101 approaches that go beyond standard consumer applications. These scenarios often involve higher heat loads, extended operating periods, or environmental conditions that challenge conventional thermal management solutions.
Professional workstations used for content creation, scientific computing, or other demanding applications benefit from premium thermal compounds and more frequent maintenance intervals. The improved thermal transfer capabilities of high-end thermal pastes can provide meaningful performance improvements when processors operate near their thermal limits for extended periods.
Extreme Cooling Applications
Enthusiasts pursuing maximum performance through overclocking or extreme cooling solutions require specialized Thermal Paste 101 knowledge and techniques. Liquid metal thermal compounds offer superior thermal conductivity but require expert application skills and careful compatibility considerations. These compounds can damage certain materials and require specific application techniques to prevent system damage.
Subzero cooling applications, such as those using liquid nitrogen or dry ice for extreme overclocking, present unique challenges that require specialized thermal interface materials and application techniques. These extreme Thermal Paste 101 applications fall outside typical consumer use but demonstrate the importance of thermal management in high-performance computing.
Compatibility and Material Considerations
Different processor and cooler combinations may require specific Thermal Paste 101 approaches to achieve optimal results. Intel and AMD processors have different heat spreader designs and mounting systems that can influence thermal paste selection and application techniques. Understanding these differences helps optimize thermal management for specific hardware configurations.
Cooler design also impacts thermal paste requirements, with some designs working better with thicker applications while others perform optimally with minimal thermal compound thickness. Direct-die cooling applications, where the cooler contacts the processor die directly rather than through a heat spreader, require specialized techniques and materials for optimal results.
Long-term Stability and Maintenance
Premium thermal compounds often provide extended service life compared to budget alternatives, making them cost-effective for systems that require long-term reliability. However, even the best thermal pastes eventually degrade and require replacement. Understanding degradation patterns helps establish appropriate Thermal Paste 101 maintenance schedules for different use cases.
Environmental factors such as temperature cycling, humidity, and vibration can accelerate thermal paste degradation. Systems operating in challenging environments may require more frequent maintenance or specialized thermal compounds designed for harsh conditions. Regular monitoring helps identify when replacement becomes necessary regardless of the theoretical service life.
Conclusion: Mastering Thermal Paste Management
Understanding and implementing proper Thermal Paste 101 procedures represents a fundamental skill for anyone serious about computer maintenance and performance optimization. The knowledge and techniques covered in this comprehensive guide provide the foundation for maintaining optimal thermal management throughout your system’s operational life.
Building Confidence Through Practice
Mastering Thermal Paste 101 techniques requires practice and patience, but the benefits justify the learning investment. Start with less critical systems or older hardware to develop your skills before working on expensive or mission-critical computers. Each successful thermal paste replacement builds confidence and expertise that transfers to future maintenance tasks.
Remember that thermal paste replacement is a routine maintenance procedure rather than a complex repair. With proper tools, techniques, and preparation, most users can successfully complete Thermal Paste 101 procedures and achieve professional-quality results. The key lies in careful preparation, systematic approach, and attention to detail throughout the process.
Long-term Benefits and System Health
Regular thermal paste maintenance through proper Thermal Paste 101 practices provides numerous long-term benefits beyond immediate performance improvements. Proper thermal management extends component lifespan, maintains system stability, and preserves performance consistency over time. These benefits translate to reduced replacement costs, improved productivity, and enhanced user satisfaction.
The skills developed through Thermal Paste 101 mastery also transfer to other computer maintenance tasks and provide a deeper understanding of system thermal management. This knowledge proves valuable when troubleshooting performance issues, planning system upgrades, or optimizing cooling solutions for specific applications.
Future Considerations and Continued Learning
As computer technology continues evolving, thermal management requirements and techniques will continue advancing. Staying current with Thermal Paste 101 developments and new thermal compound technologies helps ensure your maintenance practices remain effective and appropriate for modern hardware.
The fundamental principles covered in this Thermal Paste 101 guide will remain relevant regardless of technological advances. Understanding thermal transfer, proper application techniques, and systematic troubleshooting approaches provides a solid foundation for adapting to future developments in thermal management technology.
By implementing the knowledge and techniques presented in this comprehensive Thermal Paste 101 guide, you’ve gained the expertise needed to maintain optimal thermal management for your computer systems. Regular application of these principles will reward you with improved performance, enhanced reliability, and extended system lifespan for years to come.
The Illusion of Stability in Modern Updates For most users, operating system updates are something that simply happen. They arrive quietly, often installing in the background, requiring little more than…
Macbook Neo, How Does It Compare To Air & Pro? Over the last few years the laptop market has experienced one of the most significant architectural changes in its history.…
Apple’s latest product announcements mark one of the most significant shifts in the Mac lineup in more than a decade. While Apple routinely updates its hardware with faster chips, incremental…
There is a particular kind of frustration that only a slow computer can produce. It is not dramatic. It is not urgent. It does not scream for attention. Instead, it…
Small business computer maintenance planning starts with the work you cannot afford to lose. Identify the computers, accounts and files behind those tasks, then agree when maintenance can happen and…
Phone says charging but battery not increasing is one of the most frustrating problems smartphone users face. You plug it in.The lightning bolt appears.It says “Charging.” But the battery percentage…
Apple’s rumour cycle always looks like a thousand disconnected leaks — until you line them up and notice the same themes repeating: AI-first silicon, camera and display differentiation, form-factor experiments (foldables / spatial…
Wi-Fi connected but no internet is one of the most frustrating messages you can see on a computer or laptop. The Wi-Fi icon shows full bars.It says “Connected.”But websites won’t…
Unfortunately, there was an error submitting your request.
Please try again later, or reach out to us directly. You can call us at +44 1429 280955 or email us at sales@kingfishercomputers.co.uk for assistance. We’re here to help you get your computer back up and running!
We’ve received your booking, Our team will get in touch with you shortly to confirm the details. You’re one step closer to having your computer fixed! If you have any urgent questions, feel free to contact us. Otherwise, sit back, and we’ll handle the rest.
Contact Kingfisher Computers
No appointment required. You’re welcome to pop into the shop during opening hours.
ENQUIRY RECEIVED
Thank you
Monday–Friday
9am–5pm
Saturday
9am–4:30pm
Sunday
Closed
Bank holidays
Closed
38 Church Street, Hartlepool, TS24 7DG For home visits and callouts, please wait for us to arrange a time.
Contact Kingfisher Computers
No appointment required. You’re welcome to pop into the shop during opening hours.
ENQUIRY RECEIVED
Thank you
Monday–Friday
9am–5pm
Saturday
9am–4:30pm
Sunday
Closed
Bank holidays
Closed
38 Church Street, Hartlepool, TS24 7DG For home visits and callouts, please wait for us to arrange a time.